
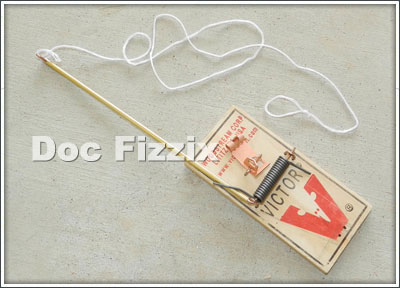
Mouse Trap Cars: Attaching a Lever Arm
Gearing determines how far and how fast your mousetrap racer will travel. Learn how to attach a lever arm to a mousetrap in order to control a vehicles gearing.
Changing the length of a mouse trap's snapper (or lever arm) is how you control a mousetrap vehicle's acceleration and/or travel distance. Different lengths of lever arms can be used to increase and/or decrease the pulling force and change the amount of string that can be pulled off the drive axle. Changing the length of the lever arm does not change the total energy and/or the torque produced by the mouse trap but it does change the pulling force applied to the drive axle. Longer lever arms have less pulling force than shorter lever arm but longer lever arm pull more string from the drive axle than shorter lever arm. Changing the length of the mouse trap's lever arm is the number one way to control a mousetrap vehicles performance.
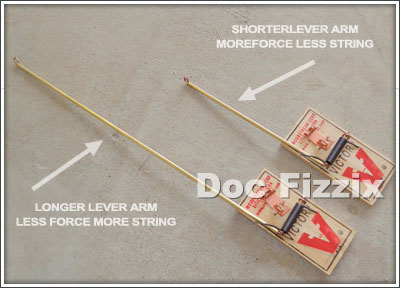
bonus tip: the length of the lever arm determines the pulling force and the length of string that can be wrapped around the drive axle.
Lever Arm Materials
When selecting a lever arm it is important to think about the strength of the material you are selecting. Some materials are not strong enough to be used for long lever arms and will bend under the tension of the mouse trap's spring. If a lever arm bends under the tension of the mouse trap's spring valuable energy will be wasted long before the mousetrap vehicle even starts moving. If you look carefully at the mouse trap of a full wound mousetrap vehicle that has a bending lever arm you will notice that the mouse trap's spring is not fully compressed and therefore is not starting with all it's possible potential energy. In most cases brass tubing and brass brazing rods make excellent lever arms because of their high-strength and light-weight. Wood can also make for a very strong and light-weight lever arm if it is used properly (see making a super long lever arm). Coat hangers make poor lever arms because they tend to bend easily under tension and should be avoided. Some times you may discover after you have assembled your mousetrap vehicle that the lever arm is bending under tension in which case you should try to replace it with a different material.

bonus tip: a weak lever arm will bend under tension causing the mouse trap's spring to not fully compress. A weak lever arm will prevent a mousetrap car from starting with it's maximum possible energy.
Attaching a Lever Arm
Depending on the contest rules there are two methods illustrated her for attaching a lever arm to the mouse trap. Make sure you review and understand the contrast rules in order to select the best method to follow. If the rules state that the mouse trap's snapper arm cannot be cut and/or altered then skip down to the next section after the "cut and replace method" posted directly bellow.
Cut and Replace Method of Attachment
In the cut and replace method for attaching a lever arm the existing mouse trap's snapper arm is cut with a wire cutter and then a 1/8 inch brass tube is placed over the remaining part of the cut mouse trap's snapper arm. By using this method for attaching the lever arm the mouse trap will no longer be capable of being set in the normal tradition.
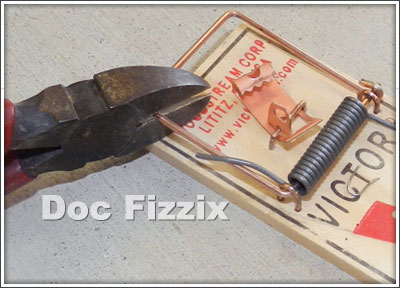
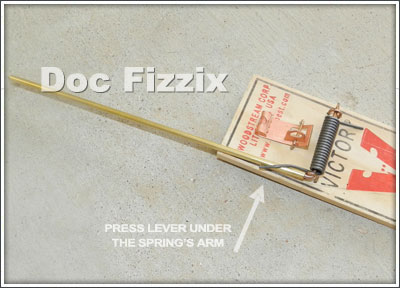
step #1: Cut the mouse trap's snapper arm just bellow the corner on the side of the snapper that has the spring pressing down on it as pictured and removed the cut piece.
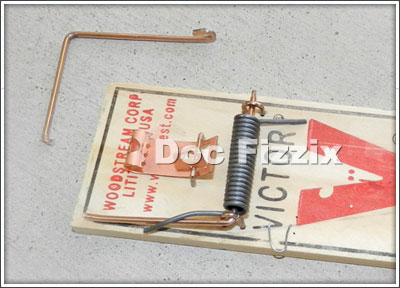
how it looks: the mouse trap with the cut section removed.
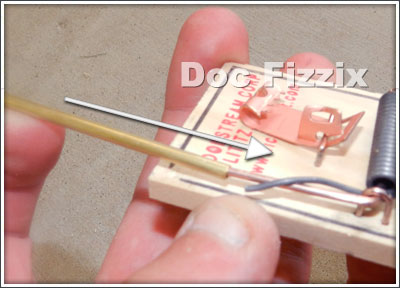
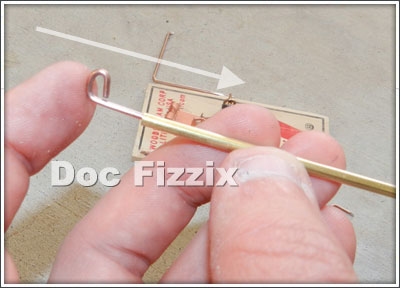
step #2: A 1/8 inch brass tube is placed over the uncut part of the snapper arm still on the mouse trap.
how it looks: the new lever arm pushed under the spring's arm.
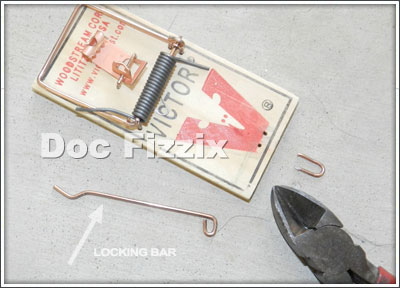
step #3: remove the mouse trap's locking bar as pictured by prying out the U-shapped nail that holds the bar in place.
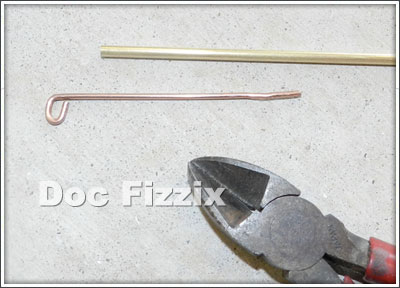
step #4: straighten the mouse trap's locking bar( note: a small bend can be placed in the bar to help hold it inside the lever are ellimnating the need for gluing).
step #5: insert the locking bar into the open end of the lever arm as pictured.
step #6: Tie the string to the locking bar's loop.
Tie-Method
Some contest rules state that the mouse trap can not be altered from it's original working condition. In this method a lever arm is attached to the side of the mouse trap's snapper arm without cutting the snapper itself so the mouse trap can still be set in the traditional method. This method can be used to secure a longer lever arm to the mouse trap's snapper without having to cut the snapper.
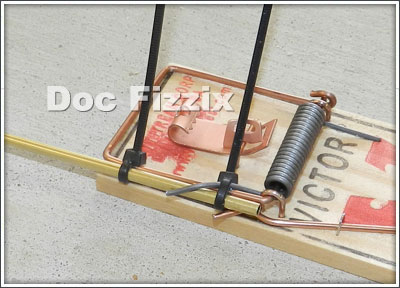
step #1: Attach a lever arm to the side of the mouse trap's snapper using several pieces of picture wire or three small zip-ties as pictured.
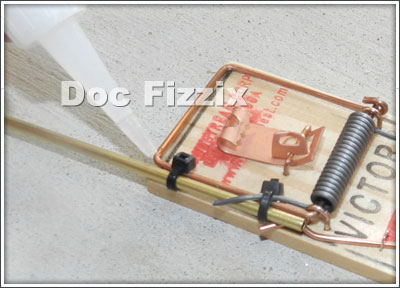
step #2: Trim any left over wire/tip-zie and then place a small amount of super glue on the wire/zip-ties to secure them in place and to the snapper arm.
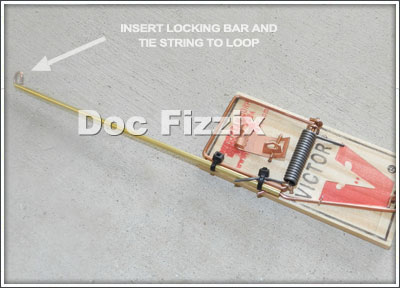
step #3: place the locking bar in the open end of the lever arm and tie the string to the locking bar's loop.
Total Replacement Method
In this method the original mouse trap's snapper arm is removed all together and then replaced with a new assembly. The replacement lever arm is either a 1/8 brass or steel rod (not a coat hanger).
step #1: Cut the mouse trap's snapper arm just bellow the corner on the side of the snapper that has the spring pressing down on it as pictured and removed the cut piece.
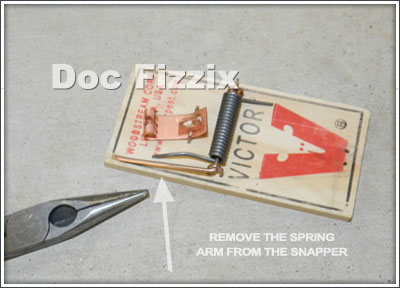
step #2: Using a needle noised pliers remove the spring from the snapper arm as pictured.
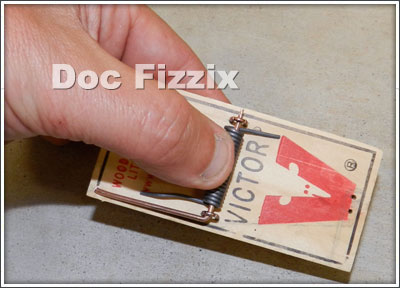
step #3: With your thumb, press down on the mouse trap's spring as pictured.
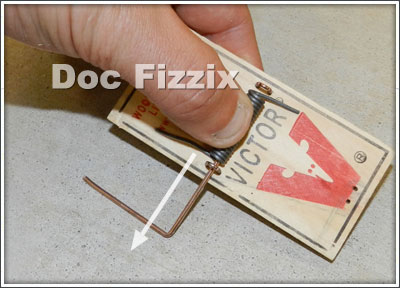
step #4: Slide what is left of the snapper arm out from under the mouse trap's spring.

step #5: Bend your replacement lever arm to mimic the removed snapper arm.

step #6: Pressing down on the mouse trap's spring, slide the replacement lever arm through the mouse trap's hold down loops as pictured.

step #7: Using a needle noised pliers place the spring over the replacement lever arm as pictured.
*Can't find what you're looking for? Ask Doc Fizzix »